Settings: Business & Team
Business Info is the source of truth for your account — name, address, time zone, and contact details used across emails, funnels, and automations.
The Settings area is where you shape how your CRM behaves for everyone on your team. It controls everything from what your business is called in outgoing messages to who can access what, how your pipelines are organized, and when your calendars accept bookings. Getting these right early saves a lot of cleanup later.
This page walks through five sections: Business Profile, My Staff, My Profile, Pipelines, and Calendar Settings.
Business Profile
Section titled “Business Profile”
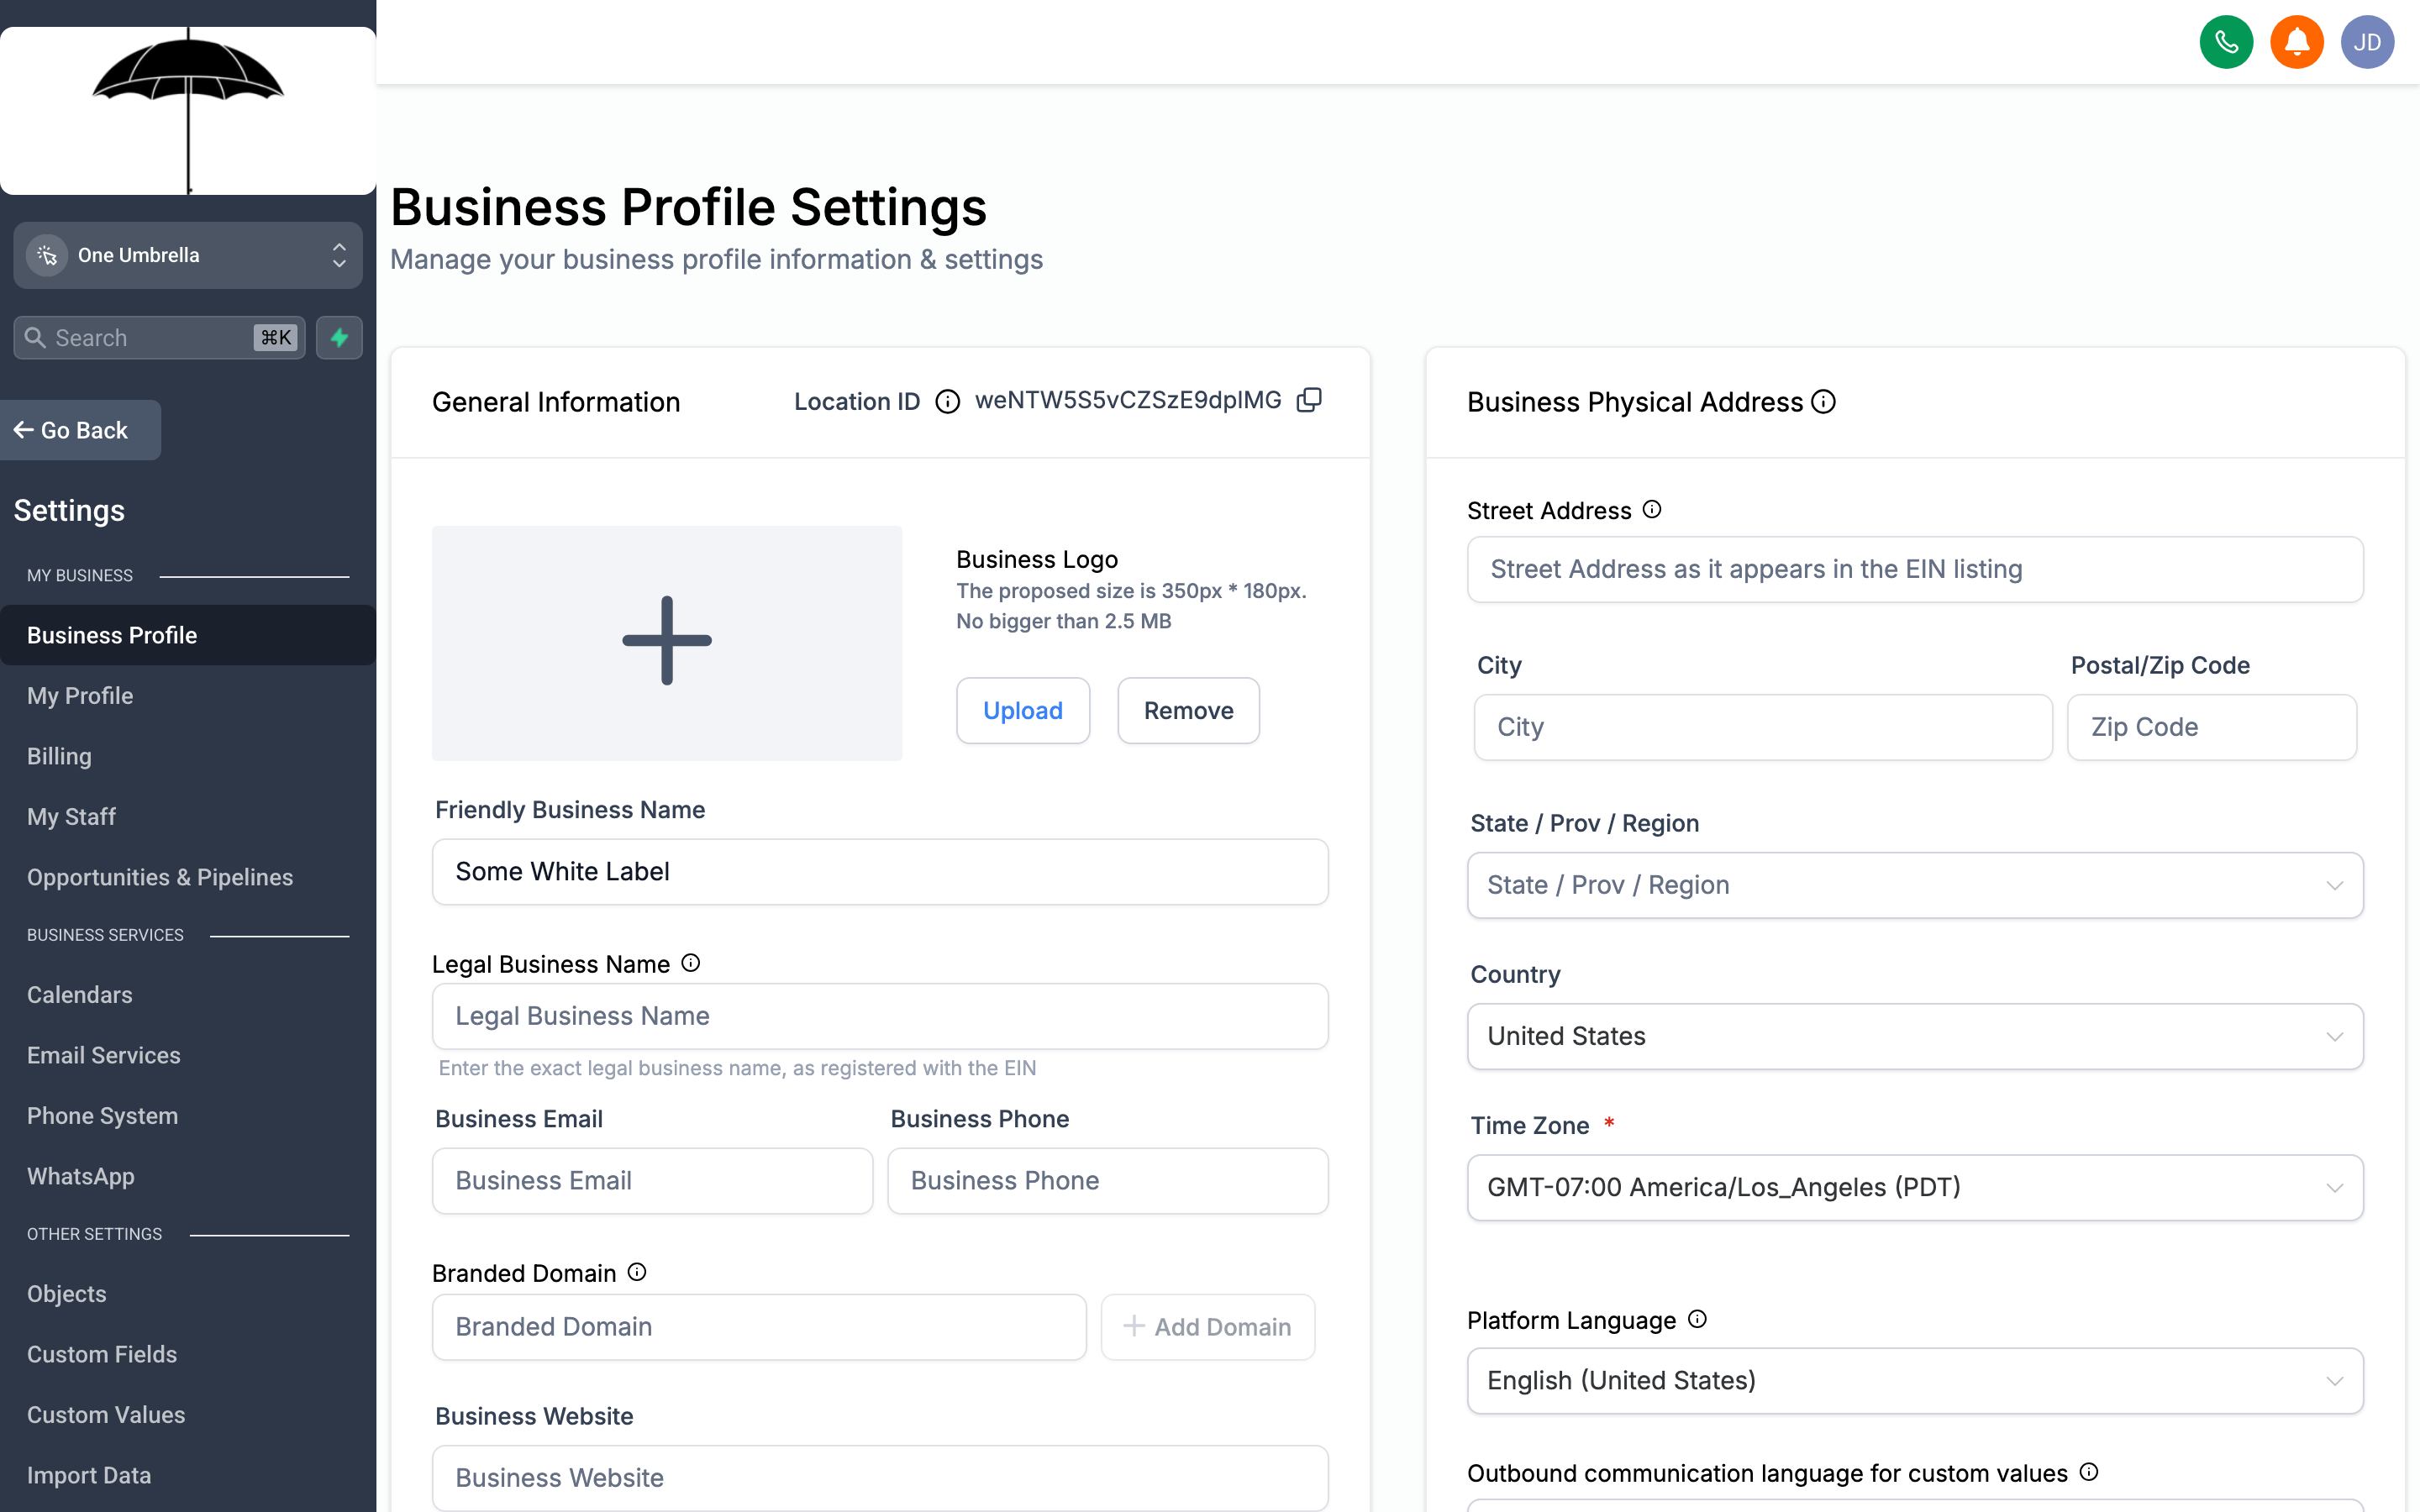
Every outgoing communication — emails, SMS, automations — pulls your business name and contact info from this single source. Keep it accurate.
Go to Settings → Business Info to fill in the core details that represent your business across the platform.
What to set here
Section titled “What to set here”- Business Name — This appears in email footers, confirmation messages, and system notifications. Use the name your clients recognize.
- Address — Required for CAN-SPAM compliance in email campaigns. Enter your physical or mailing address.
- Phone Number — The main contact number for your business.
- Website URL — Used in certain default email templates and your public-facing pages.
- Industry — Helps the platform suggest relevant templates and defaults.
- Time Zone — Set this to your local time zone before you do anything else.
Why time zone matters
Section titled “Why time zone matters”Your CRM schedules appointments, queues automations, and timestamps contact activity based on the time zone you set here. If it’s wrong, a “9 AM follow-up” goes out at the wrong hour, and appointment confirmations show confusing times to clients. Set it once, correctly, and everything downstream stays in sync.
Business hours
Section titled “Business hours”Under the Business Hours section, enable the days and times your business operates. These hours are used by:
- Calendar booking rules that restrict availability outside working hours
- Automations that only run “during business hours” (e.g., a lead follow-up that waits until the next morning rather than pinging someone at midnight)
- Certain call-routing settings
Set them to reflect when your team is actually reachable.
My Staff
Section titled “My Staff”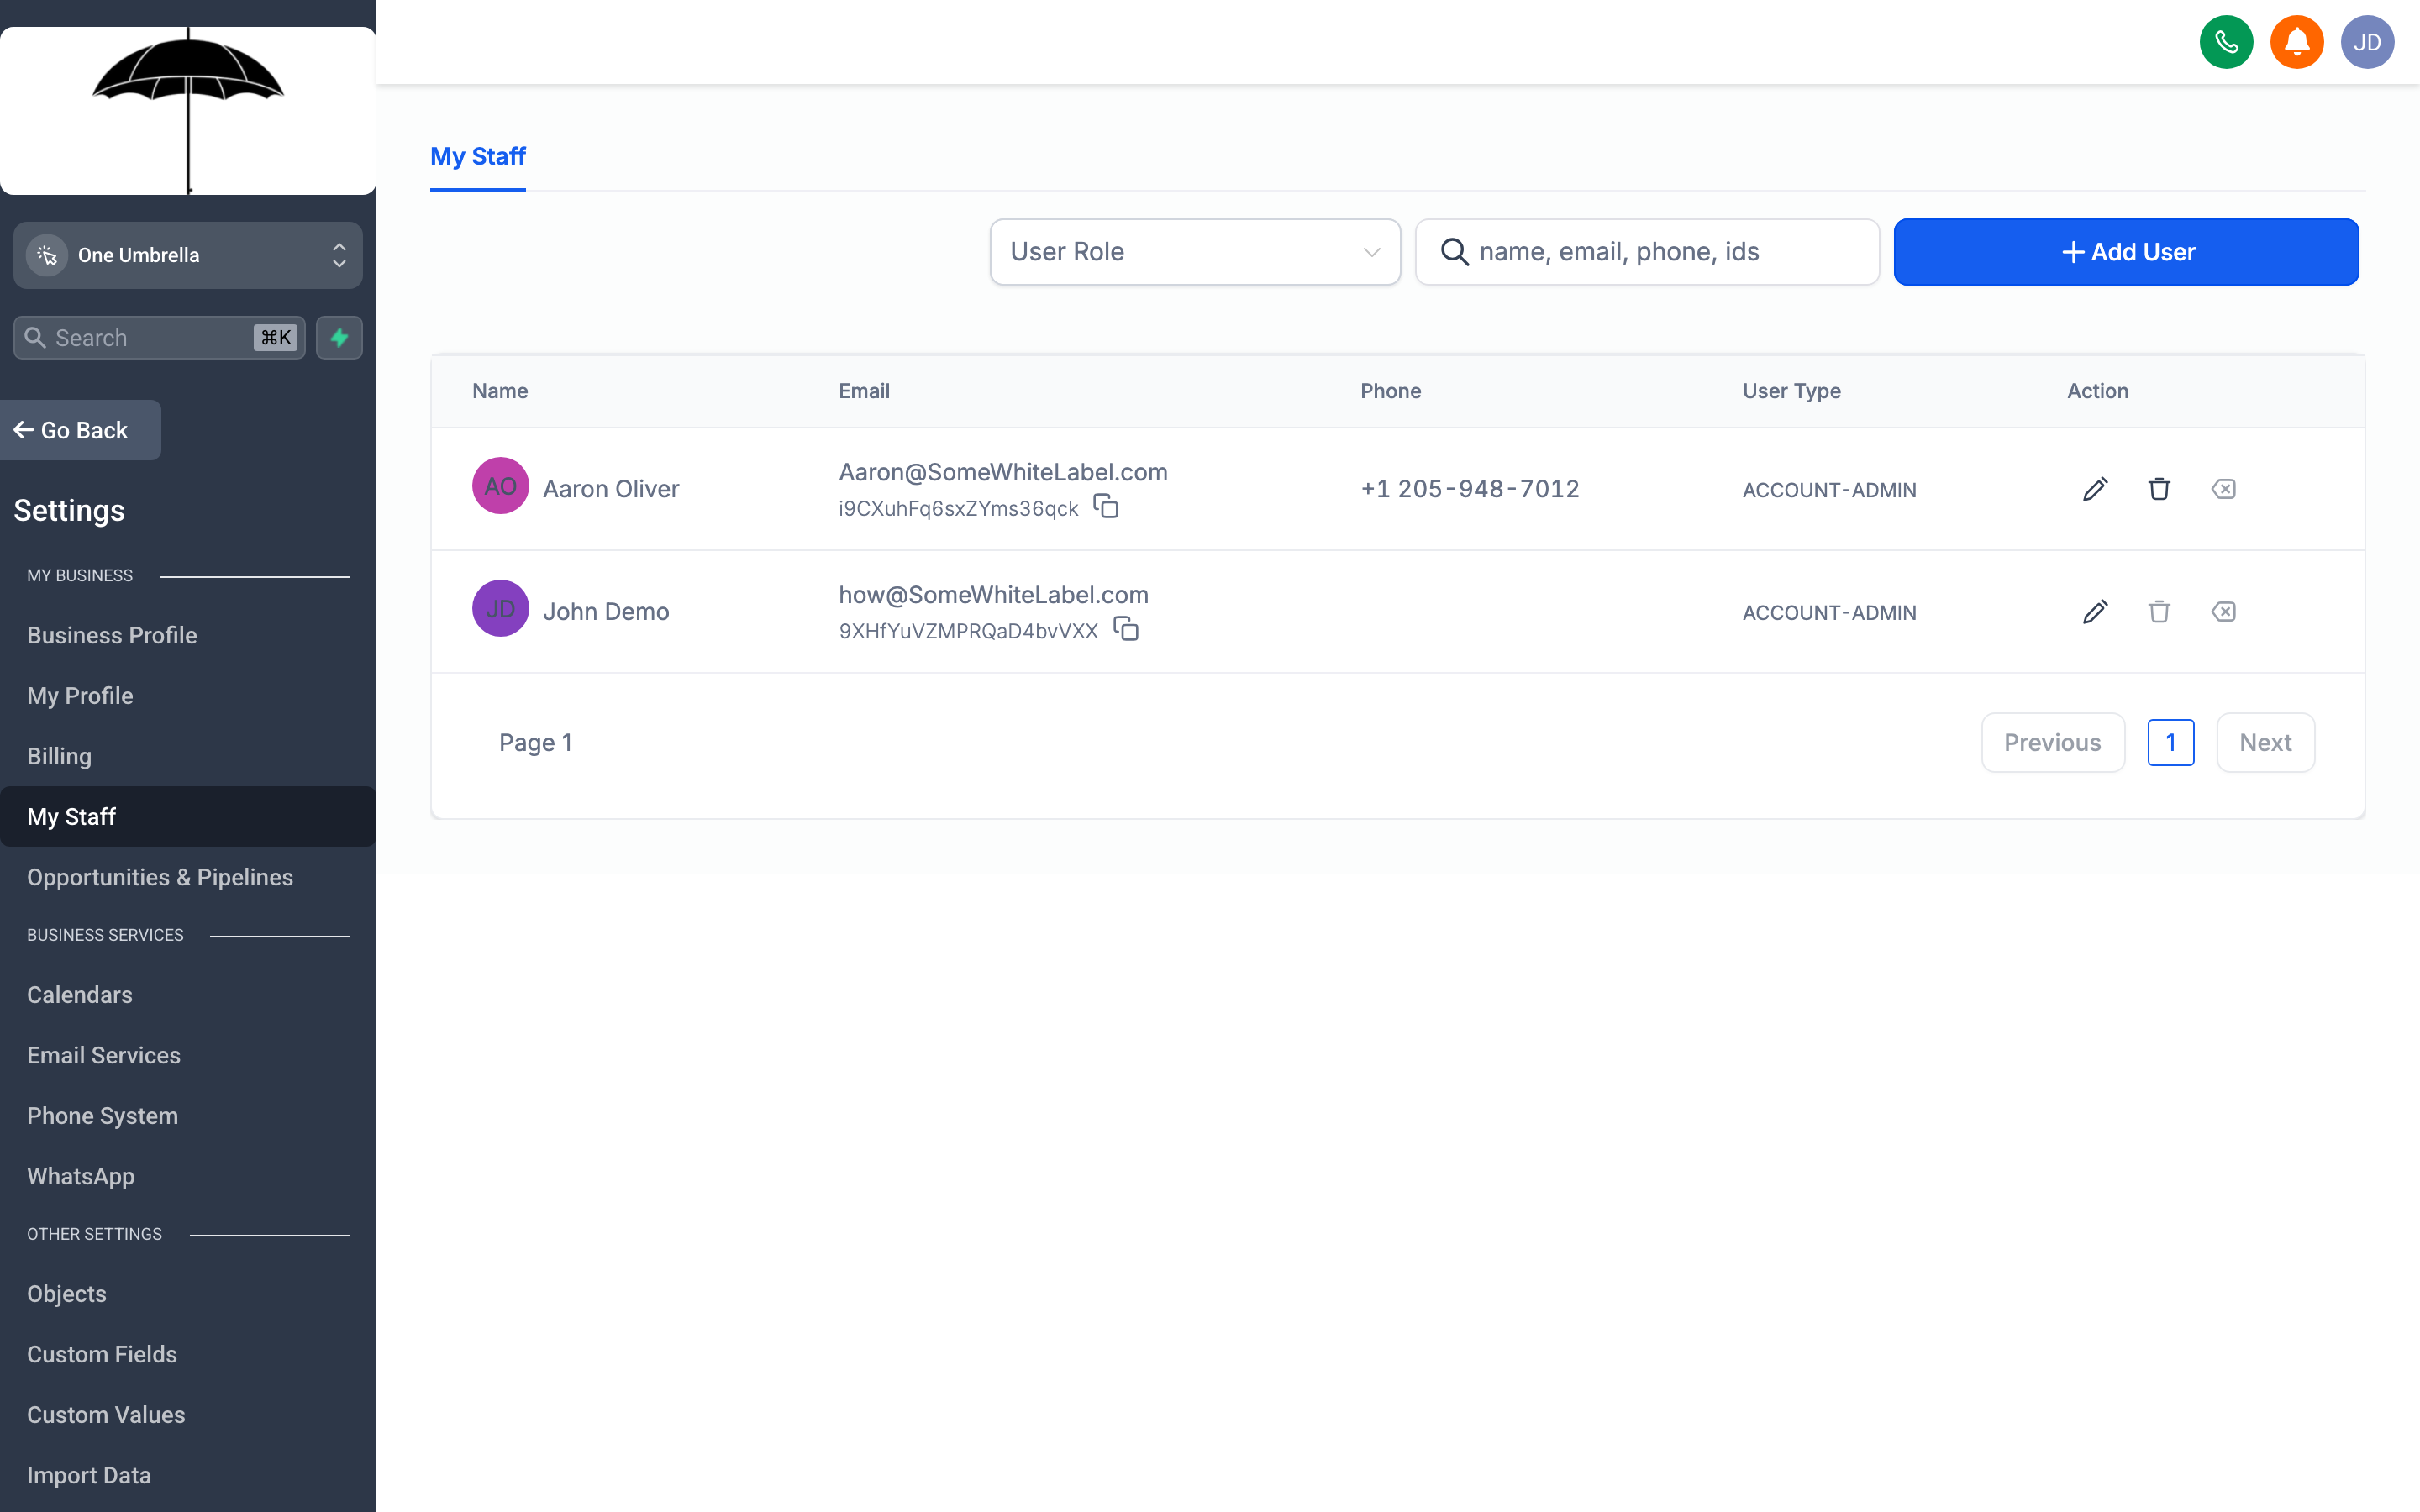
My Staff is where you manage who has access to your account and what they can do — add new team members, assign roles, and remove access when someone leaves.
Go to Settings → My Staff to see everyone who has access to your account and manage their roles.
User roles at a glance
Section titled “User roles at a glance”| Role | What they can do |
|---|---|
| Admin | Full access to all settings, contacts, automations, billing, and reporting |
| User | Access to contacts, conversations, and calendars; cannot change settings or view billing |
Give admin access only to people who need to configure the account. Most team members work fine as standard users.
Adding a staff member
Section titled “Adding a staff member”- Click Add Employee in the top-right corner of the My Staff page.
- Enter the person’s First Name, Last Name, and Email Address.
- Set their Role — choose Admin or User based on what they need.
- (Optional) Assign them to a specific User Group or team if you have those configured.
- Under Permissions, review the default access settings and adjust if needed — you can restrict access to specific pipelines, calendars, or sections of the CRM.
- Click Save. The system sends an invitation email to the address you entered.
- Ask the new team member to check their inbox and complete the account setup.
Managing existing staff
Section titled “Managing existing staff”- Edit a team member to update their role or permissions at any time.
- Deactivate a user instead of deleting them if they’ve left but you want to preserve their activity history.
- Use the Reassign option to move their open conversations or opportunities to another team member before deactivating.
My Profile
Section titled “My Profile”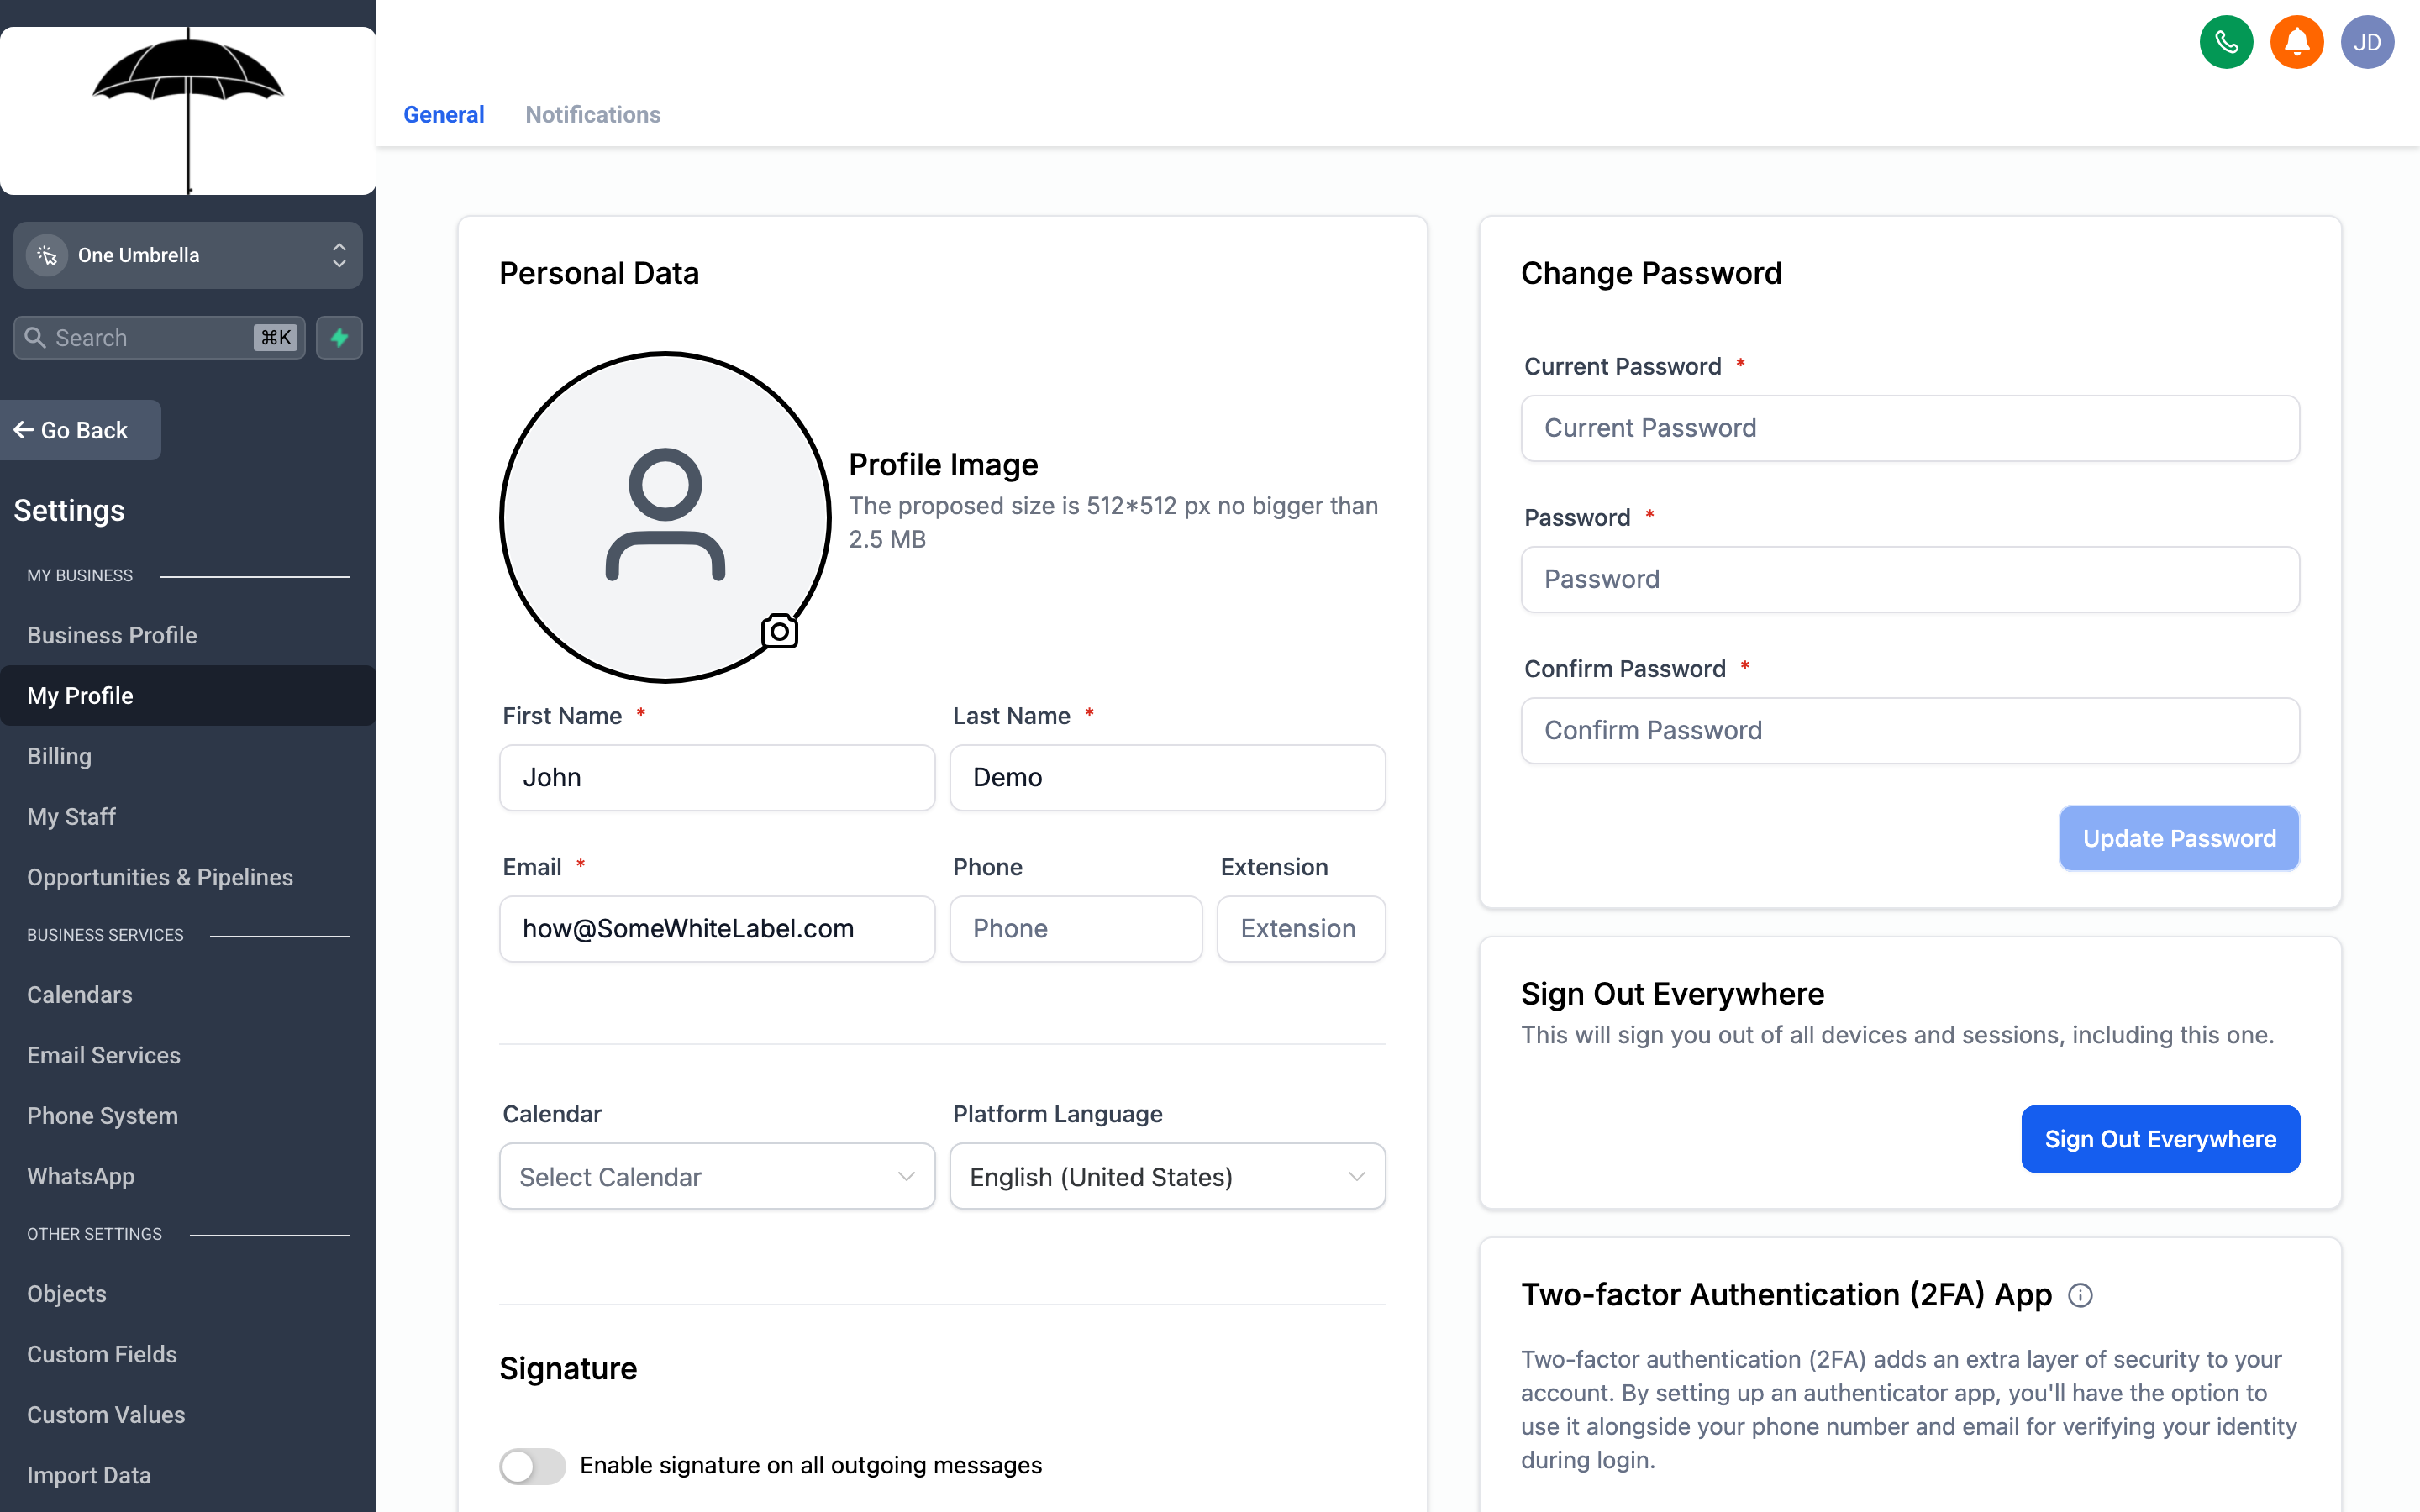
My Profile controls your personal login details, how you receive notifications, and the signature that appears in outgoing emails sent from your account.
Go to Settings → My Profile to update your own account — this only affects you, not other team members.
What you can update
Section titled “What you can update”- Name and Photo — How your name and avatar appear in conversations and contact records.
- Email Address — Your login email. Changing it sends a confirmation to the new address.
- Password — Update it here. Use a strong, unique password and don’t reuse it from other accounts.
- Phone Number — Used for two-factor authentication and internal notifications.
Notification preferences
Section titled “Notification preferences”Scroll down to the Notifications section to control which events send you an alert — new leads, inbound messages, appointment bookings, and more. You can choose to receive notifications via email, browser push, or mobile (if you have the app installed).
Turn off notifications you don’t act on. A high volume of low-signal alerts trains you to ignore all of them.
Email signature
Section titled “Email signature”Your Email Signature appears at the bottom of emails sent manually from your contact conversations. Set it once here and it applies automatically whenever you compose an email from the conversation view.
Pipelines
Section titled “Pipelines”
Pipelines define the stages your opportunities move through — from first contact to closed deal. Configure them here to match how your team actually works.
Go to Settings → Pipelines to create and manage the opportunity pipelines your team uses.
What a pipeline is
Section titled “What a pipeline is”A pipeline is a series of stages that represents your sales or service process. Each opportunity (deal) sits in exactly one stage at a time, and your team moves it forward as progress is made. The Opportunities section of your CRM shows deals organized by pipeline and stage.
Most accounts start with one pipeline — a basic sales process — and add more as the business grows (e.g., a separate pipeline for onboarding, renewals, or service requests).
Creating a pipeline
Section titled “Creating a pipeline”- Click Add Pipeline.
- Give it a clear name that reflects the process it tracks (e.g., “Sales”, “Client Onboarding”, “Renewals”).
- Add Stages by clicking + Add Stage and naming each one. Common examples: New Lead → Contacted → Proposal Sent → Closed Won / Closed Lost.
- Drag stages to reorder them.
- Click Save.
Editing stages
Section titled “Editing stages”- Rename a stage by clicking its name.
- Delete a stage only if it has no active opportunities — the system will warn you if it does.
- Add a Win Probability percentage to each stage if you want forecasting visibility in your reports.
Calendar Settings
Section titled “Calendar Settings”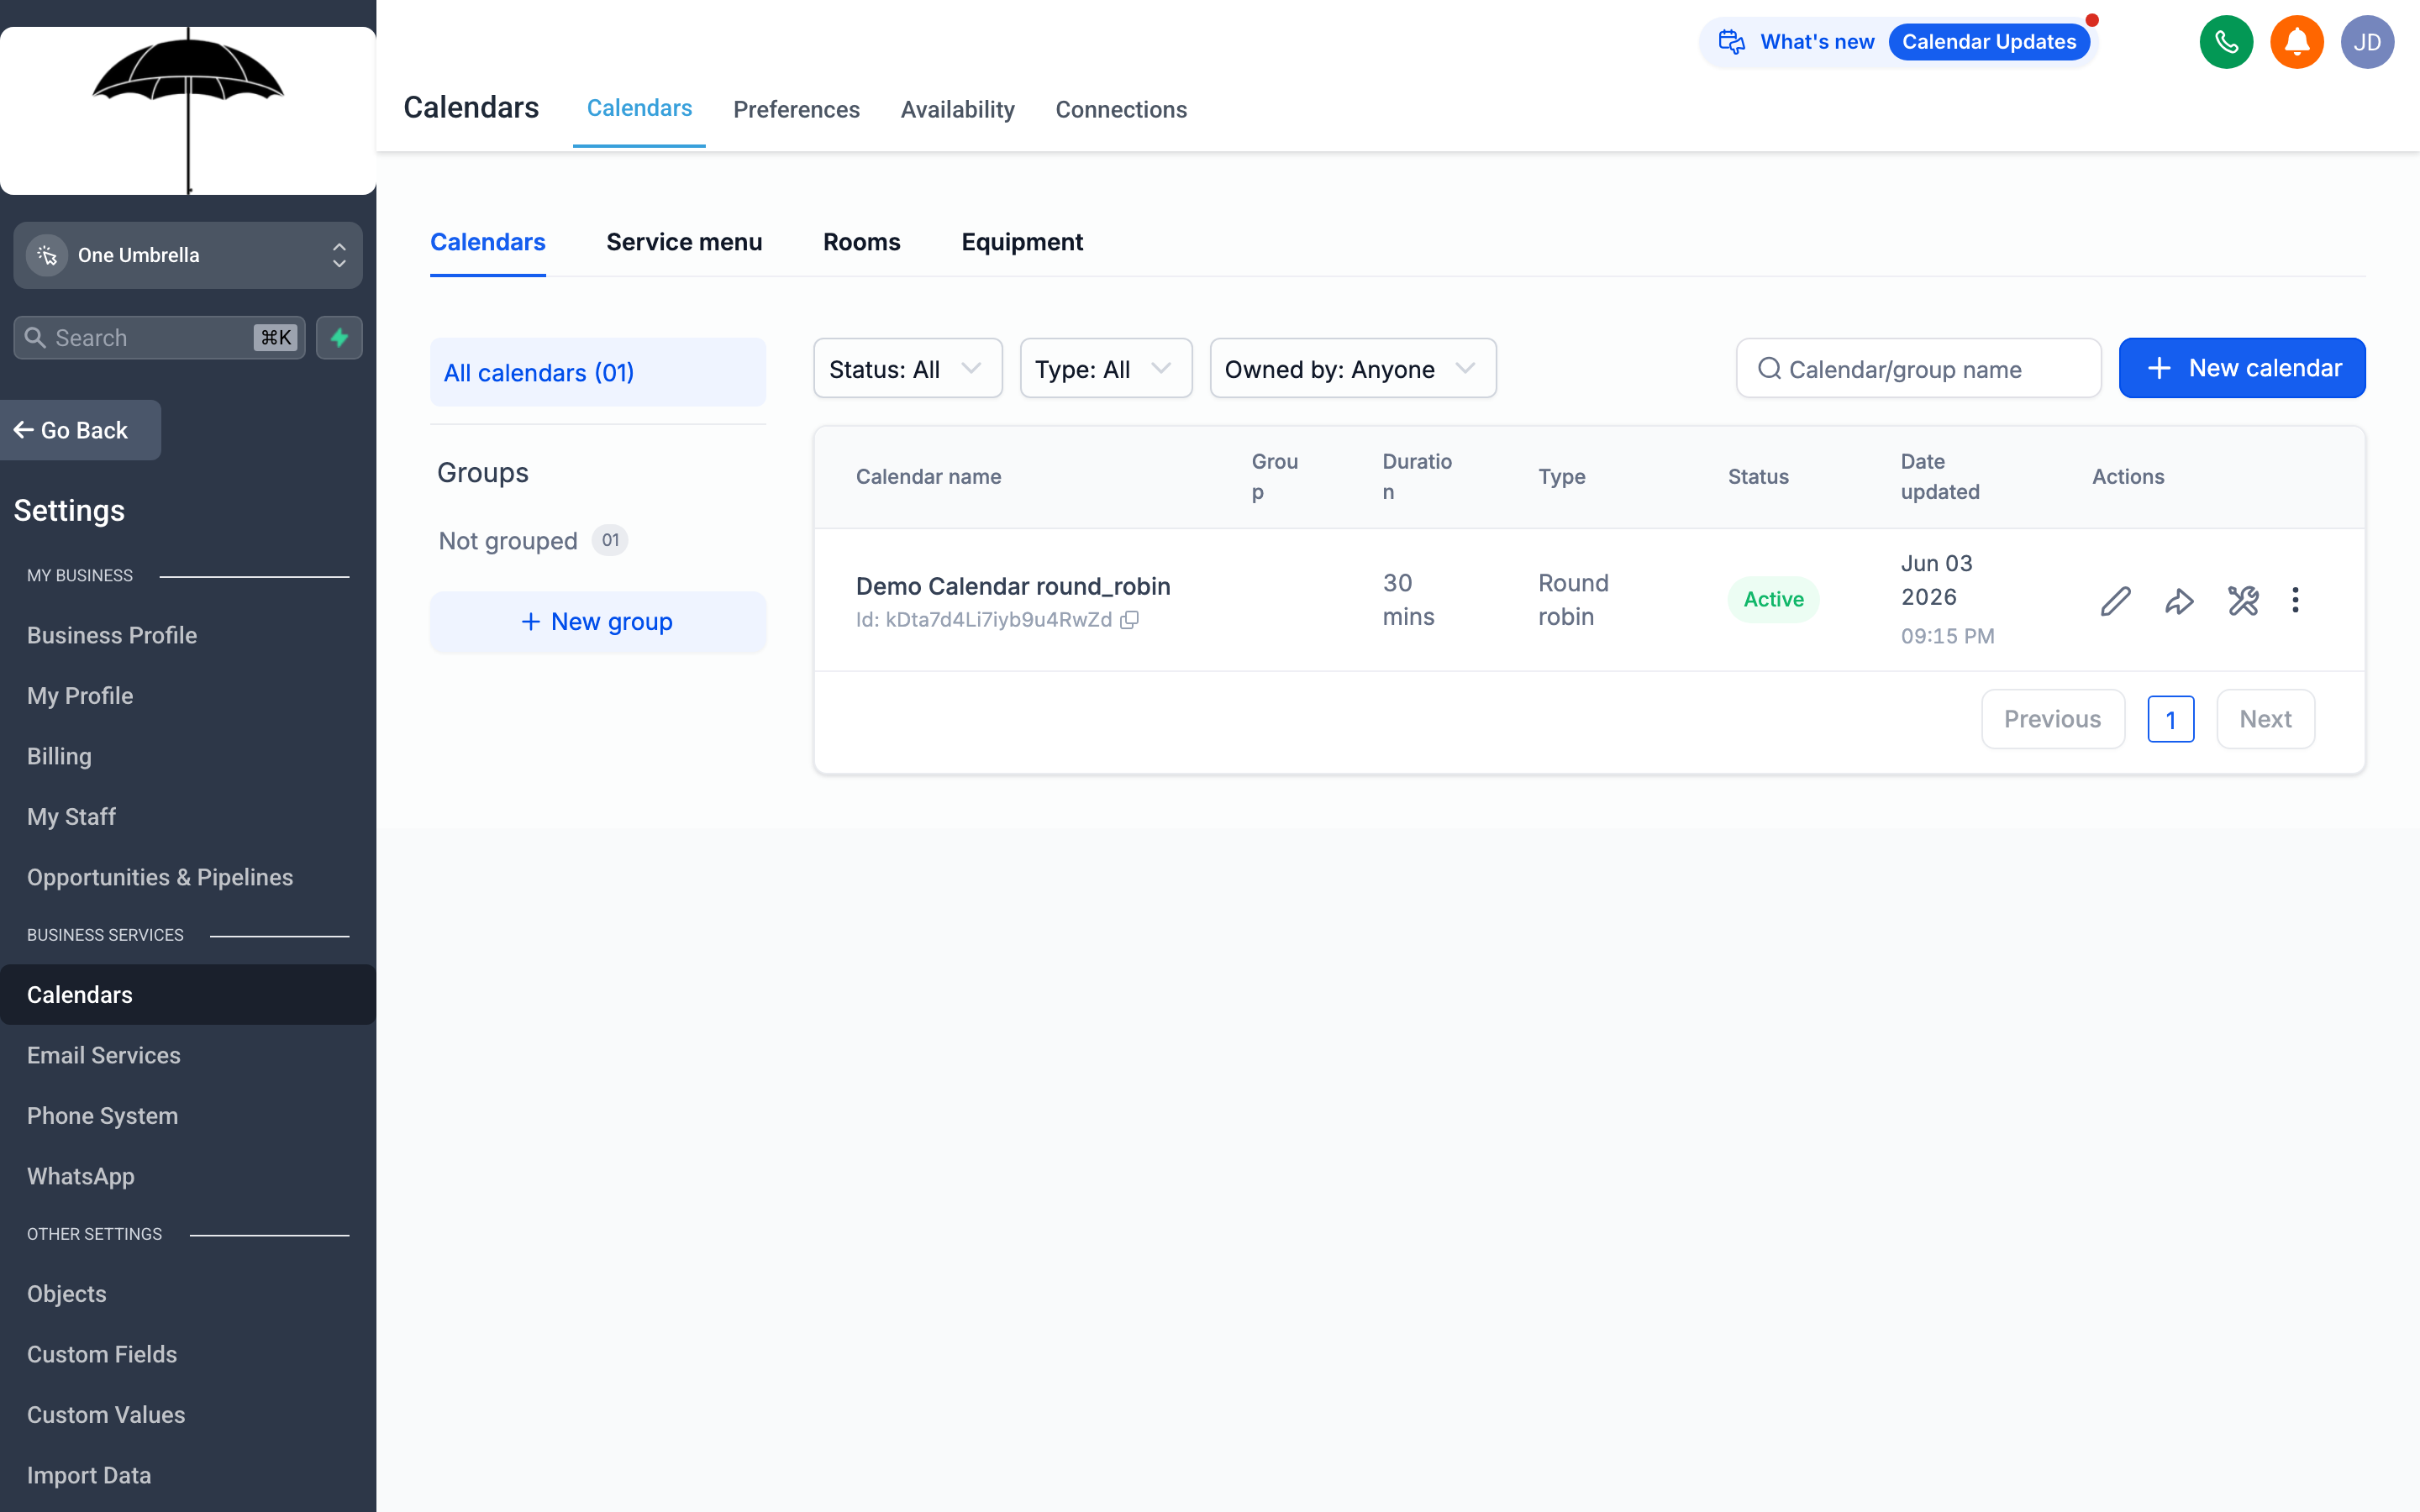
Calendar Settings control when clients can book time with you, how long appointments are, and what happens after a booking is made.
Go to Settings → Calendars to configure how your booking calendars behave.
Availability
Section titled “Availability”Set your default Available Hours — the windows during which appointments can be booked. This is separate from business hours but should generally align with them. You can set different hours for each day of the week.
- Slot Duration — How long each appointment is (e.g., 30 minutes, 1 hour).
- Buffer Time — A gap between appointments so you’re not back-to-back (e.g., 15 minutes after each booking).
- Minimum Notice — How far in advance someone must book (e.g., at least 4 hours before the appointment time). Prevents same-day panic bookings if that’s not how you operate.
- Maximum Advance Booking — How far into the future someone can schedule (e.g., no more than 60 days out).
Booking rules
Section titled “Booking rules”- Allow Recurring Appointments — Let clients book a series on a repeating schedule.
- Auto-Confirm — Approve bookings automatically, or require manual confirmation from your team.
- Calendar Sync — Connect your Google or Outlook calendar to check real-time availability and prevent double-booking (configured under Integrations).
Appointment types
Section titled “Appointment types”If your account uses multiple calendar types (e.g., a discovery call, a follow-up session, an in-person consultation), each one can have its own settings. Navigate between them using the tabs or dropdown at the top of the Calendar Settings page.