Calendars
The calendar gives you a live picture of every booking across your team — color-coded by calendar so you can spot gaps and conflicts at a glance.
Your CRM calendar is more than a schedule — it’s the connective tissue between your online booking links, your team’s availability, and the appointments that drive revenue. Every time a client books through your website or a team member adds a booking manually, it lands here. You can view appointments as a traditional calendar grid or as a sortable flat list, filter by team member or calendar, and manage statuses so you always know who showed up, who didn’t, and who cancelled.
Reading the calendar views
Section titled “Reading the calendar views”Day, week, and month
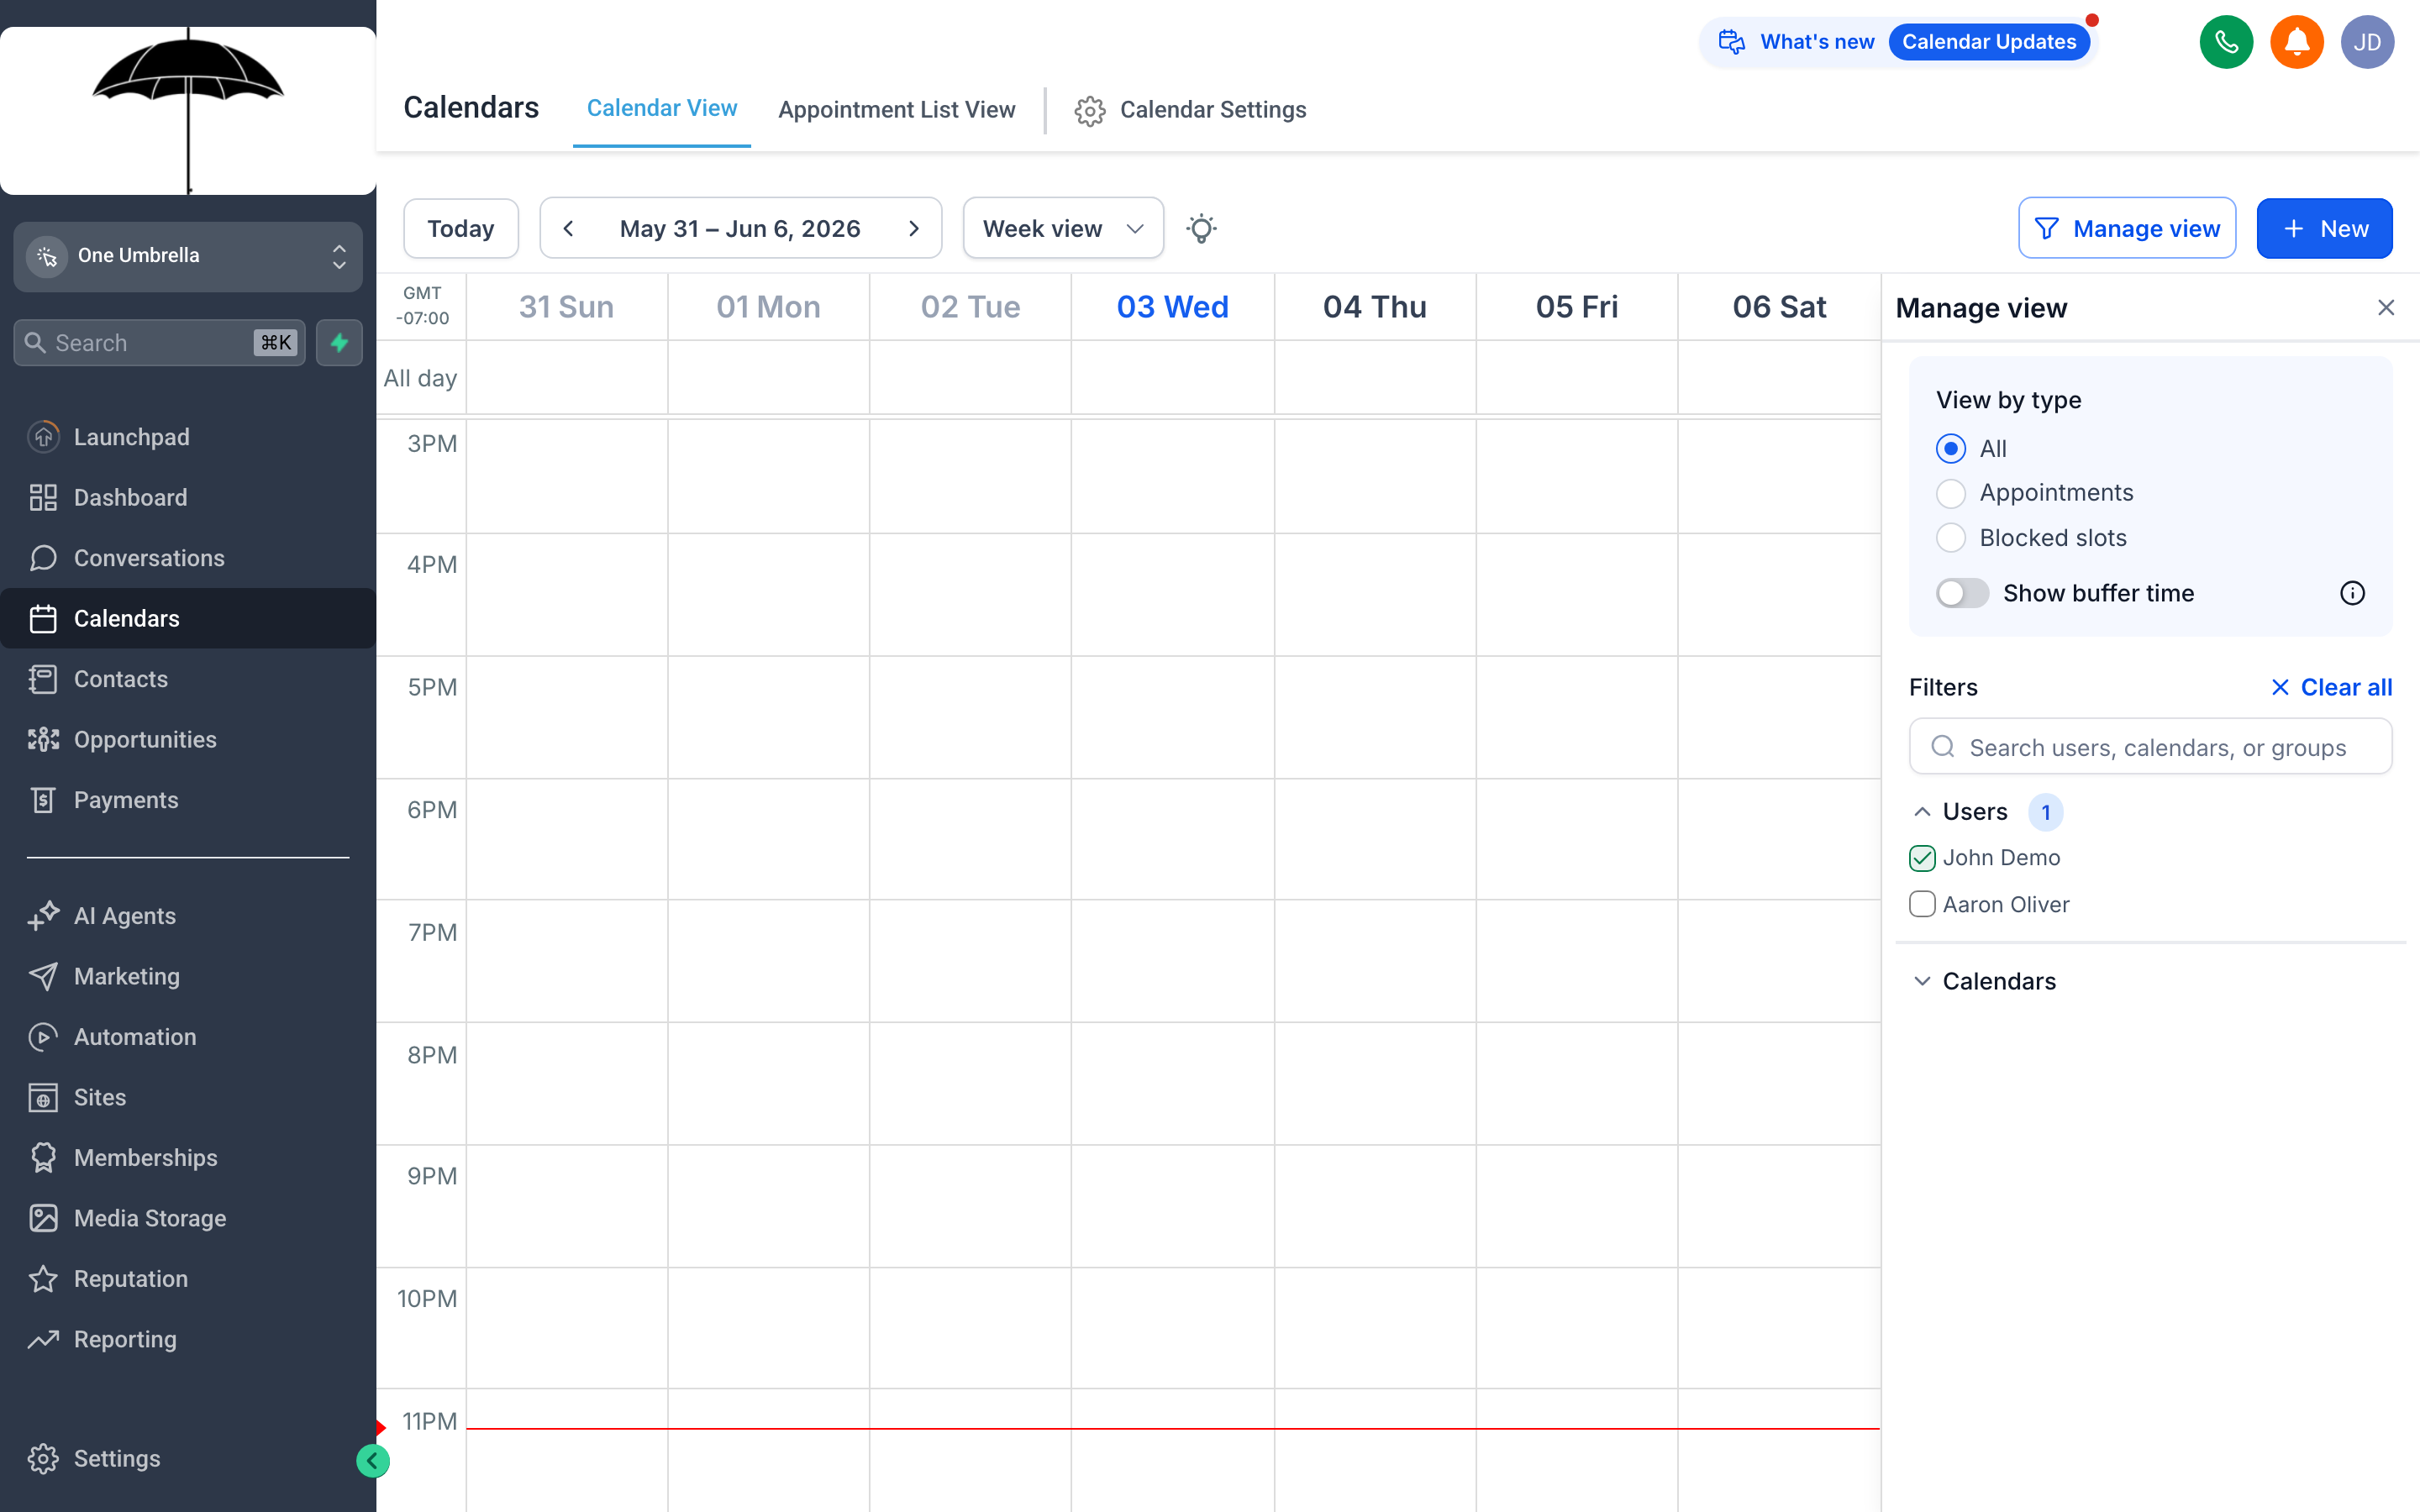
Section titled “Day, week, and month”Use the Day, Week, and Month buttons in the upper-right corner of the calendar to switch between views.
- Day view shows every hour of a single day in a vertical timeline. Use it when you need a fine-grained look at one person’s schedule or want to spot any remaining open slots in a busy day.
- Week view is the most common starting point — you can see the full spread of bookings across seven days without losing time-of-day context. Appointments appear as blocks; longer blocks represent longer appointments.
- Month view gives you the bird’s-eye picture: which days are heavy, which are light, and where you have room to grow your bookings.
Click the < > arrows next to the date header to move forward or backward, or click Today to jump back to the current date immediately.
Filtering by calendar or team member
Section titled “Filtering by calendar or team member”If your account has more than one calendar — for example, separate calendars per service type or per staff member — use the Filter or calendar selector near the top of the screen to focus on one. Viewing all calendars at once is useful for spotting conflicts; viewing a single calendar is better when you’re managing a specific person’s day.
Each calendar can have its own color so you can tell them apart at a glance in the grid view.
The Appointments list view
Section titled “The Appointments list view”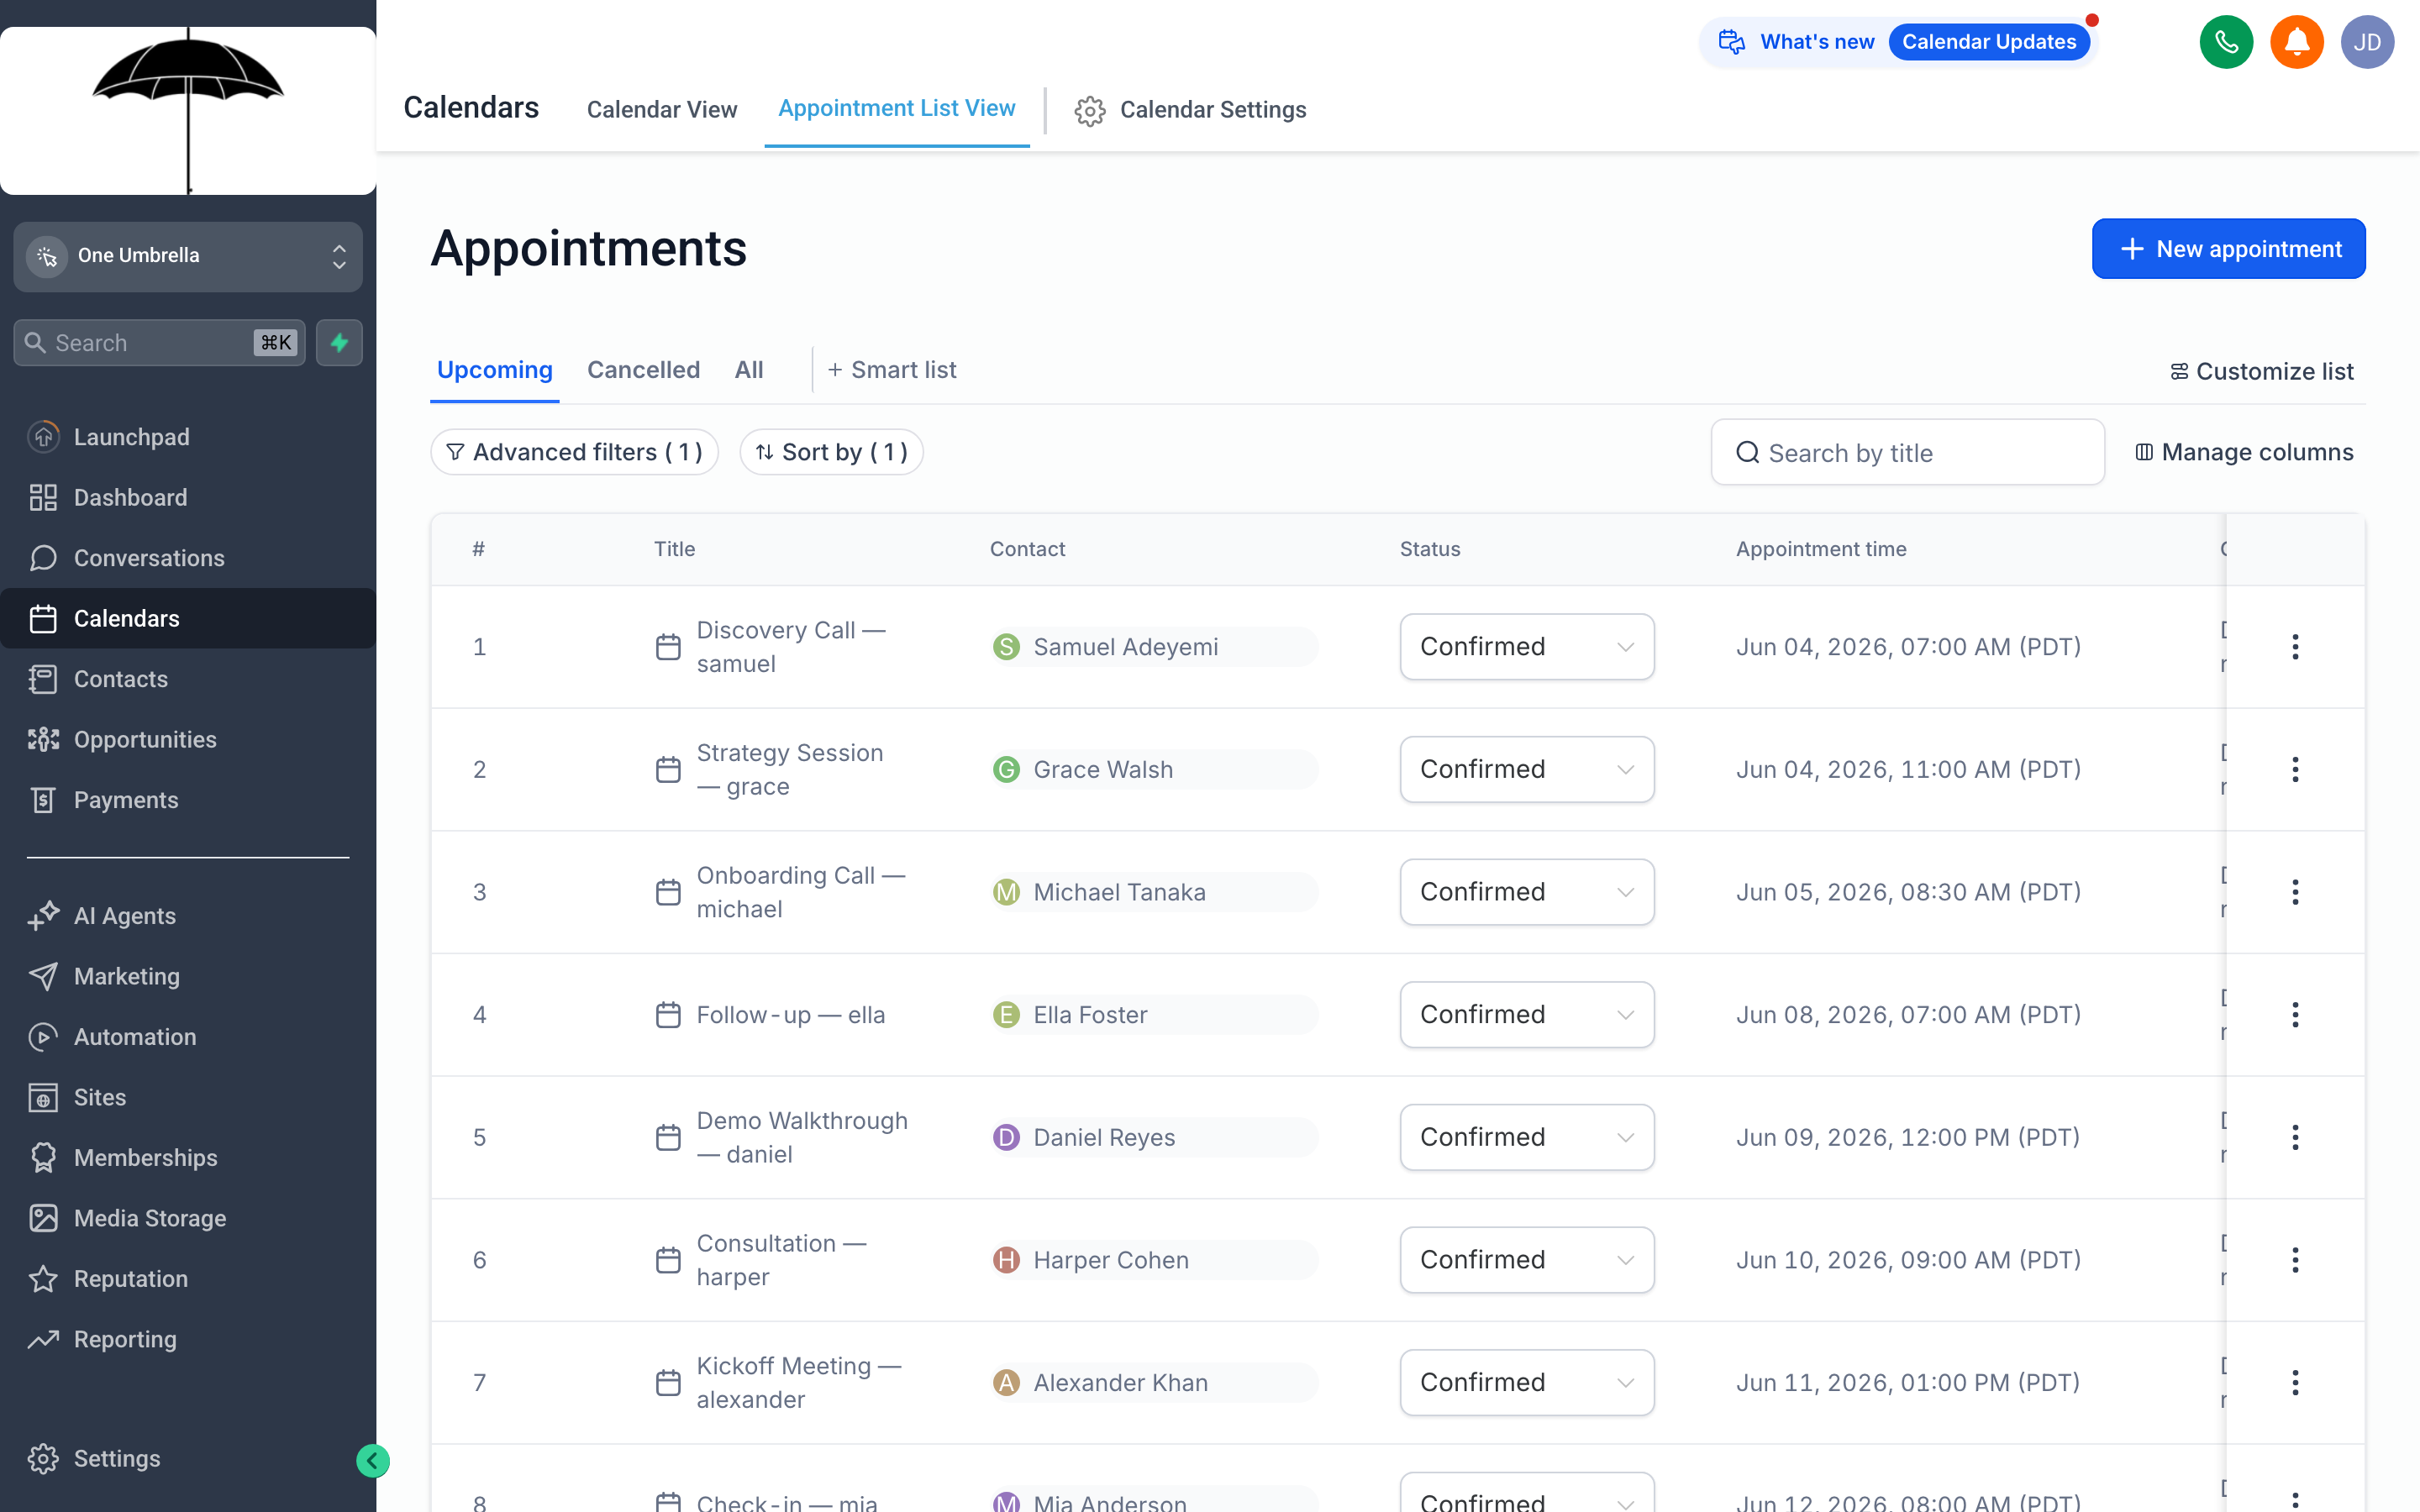
The Appointments list turns your calendar into a sortable table — perfect for reviewing the day’s bookings, finding a specific appointment, or auditing statuses in bulk.
Switch from the calendar grid to a flat list by clicking the Appointments tab or list-view icon near the top of the Calendars screen. Each row shows:
- Contact name — who the appointment is with, linked directly to their contact record
- Date & time — when the appointment is scheduled to start
- Calendar — which calendar the booking belongs to
- Status — the current state of the appointment
Click any column header to sort the list. Use the search bar or date-range filter to narrow down a long history quickly. This view is particularly useful at the end of the day when you want to mark off who showed and who didn’t, or when you need to pull a report of bookings for a specific date range.
Appointment statuses and why they matter
Section titled “Appointment statuses and why they matter”Every appointment carries one of four statuses. Keeping these current is important — your reports, automations, and follow-up sequences can all trigger based on status changes.
| Status | What it means |
|---|---|
| Confirmed | The appointment is booked and active. This is the default state when a booking is first created. |
| Showed | The contact attended. Mark this after the meeting or call wraps up. |
| No-Show | The contact didn’t attend and didn’t cancel in advance. |
| Cancelled | The contact or your team cancelled the appointment before it happened. |
To update a status, click the appointment in either the calendar grid or the list view and choose the new status from the Status dropdown inside the appointment details panel.
Booking an appointment manually
Section titled “Booking an appointment manually”When a client calls in, walks in, or you’re scheduling on someone else’s behalf, you can add an appointment directly from the calendar.
- Click the + New Appointment button in the upper area of the screen, or click directly on an empty time slot in the day or week grid view.
- In the appointment panel that opens, type in the Contact field to search for the person you’re booking with. Select them from the results. If they don’t have a contact record yet, you can create one from this same screen.
- Select the Calendar the appointment should belong to. This is important if you have multiple service types or team members — it determines whose availability is being used and which notifications go out.
- Use the Date picker to choose the appointment date, then set the Start Time and End Time (or duration, depending on your calendar setup).
- Add any internal Notes your team should see before the appointment — prep instructions, client preferences, anything relevant.
- Click Save. The appointment appears on the calendar immediately. If your calendar is configured to send confirmations, the contact will receive a notification automatically.
How online booking fills your calendar
Section titled “How online booking fills your calendar”When you share a booking link generated from your calendar settings, clients choose an available time slot and the appointment is created automatically — no back-and-forth emails required. The system enforces your availability rules, blocks out times that are already taken, and respects any buffer time configured between appointments.
Online bookings arrive with a Confirmed status by default. Depending on your configuration, a confirmation email or SMS goes out to the client the moment they book, and a notification goes to your team.
Your job on the calendar side is to make sure the availability settings are accurate — correct hours, correct buffer times, and the right team member assigned — so the booking page always reflects reality.
Tips for avoiding double-bookings
Section titled “Tips for avoiding double-bookings”A few consistent habits keep your calendar clean and your team’s time protected.
- Set buffer time between appointments. Most calendar configurations let you add a gap before or after each booking. Even a five-minute buffer prevents one appointment from bleeding into the next when things run a minute long.
- Use one calendar per service or team member. If the same service has two separate calendars, neither one knows about the other’s bookings. Consolidate so the availability shown to clients is always accurate.
- Keep all bookings inside your CRM. If team members schedule things externally — in a phone calendar or another tool — those blocks won’t appear here, and the booking page will show those slots as open when they aren’t.
- Mark statuses promptly. Cancelled appointments still showing as Confirmed make the calendar look fuller than it is and can affect availability windows if your settings are strict.
- Sync external calendars. If you integrate an external calendar such as Google Calendar, allow a few minutes for changes to propagate in both directions before assuming a slot is truly free.