Settings: Integrations & Domains
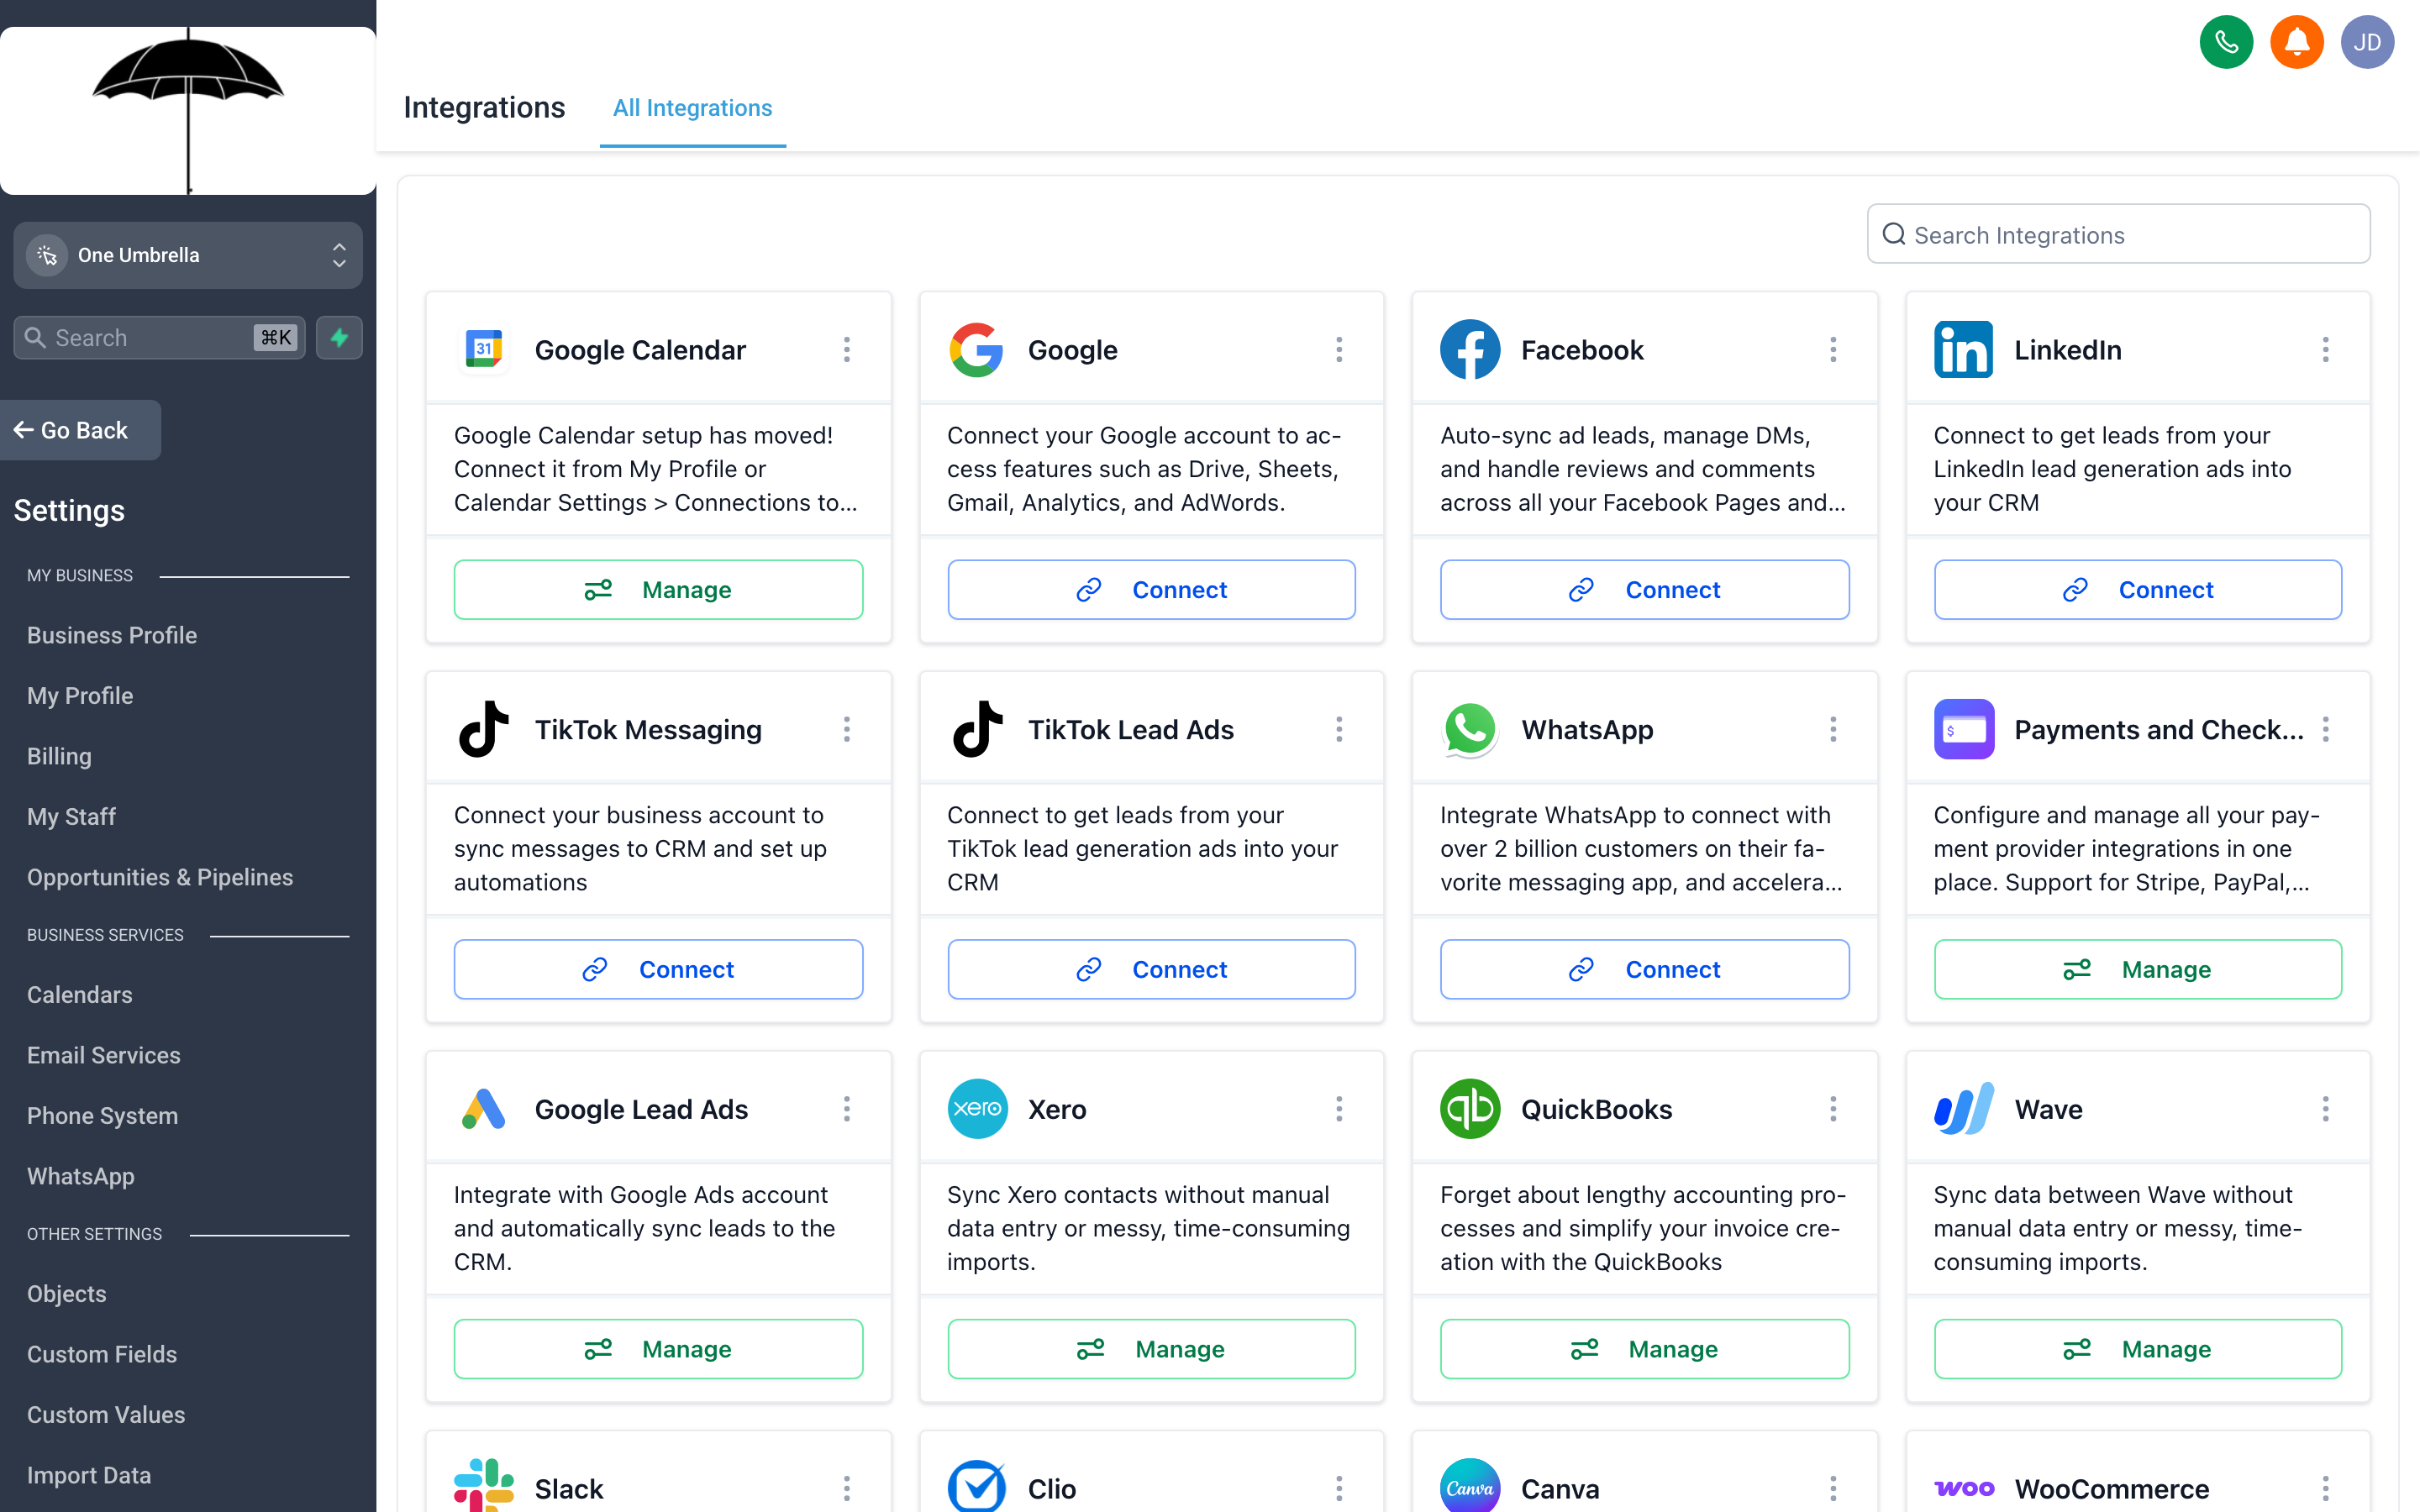
The Integrations page shows every external service your CRM can connect to — and which ones are already active. A green checkmark means it’s live; a Connect button means it’s waiting.
Your CRM is more useful when it’s plugged into the tools you already use. Integrations pull in calendar availability from Google or Outlook, process payments through Stripe or PayPal, and sync lead data from your ad accounts. Domains give your funnels and websites your real URL instead of a platform subdomain. Both are worth setting up early.
Integrations
Section titled “Integrations”Go to Settings → Integrations to connect external services to your account.
Calendar integrations
Section titled “Calendar integrations”Connecting your calendar is one of the highest-value integrations you can set up. It prevents double-booking by checking your actual availability before allowing clients to book an appointment through your CRM calendar.
Google Calendar
- Click Connect next to Google Calendar.
- Sign in with your Google account and grant the requested permissions.
- Select which Google calendar to sync (your primary calendar, or a dedicated booking calendar).
- Choose the sync direction: one-way (CRM reads your Google calendar) or two-way (new CRM bookings also appear in Google).
Microsoft Outlook / Office 365 The process mirrors Google Calendar. Click Connect next to Outlook, authorize with your Microsoft account, and select the calendar to sync.
Once connected, your CRM appointment calendar will block slots that are already taken in your external calendar, and new appointments booked through your CRM will automatically appear in your connected calendar.
Payment processors
Section titled “Payment processors”Connecting a payment processor lets you collect payments directly through your funnels, websites, and order forms — without routing clients to a separate checkout page.
Stripe
- Click Connect next to Stripe.
- You’ll be redirected to Stripe’s OAuth flow. Log in to your existing Stripe account (or create one if you don’t have one).
- Authorize the connection. You’re redirected back to your CRM with Stripe shown as connected.
Once connected, you can add Order Form and 1-click Upsell elements to your funnels, set prices, and accept credit card payments. Stripe handles the payment processing; your CRM handles the funnel and the follow-up.
PayPal Click Connect next to PayPal and follow the authorization prompts. PayPal is a good option if a significant portion of your clients prefer it over card payments.
Social and advertising integrations
Section titled “Social and advertising integrations”Facebook / Instagram Connecting your Facebook account lets you:
- Pull in leads from Facebook Lead Ads directly into your CRM contacts (no manual CSV exports)
- Connect your Facebook page to the Conversations inbox so you can respond to Facebook Messages from inside your CRM
- Run retargeting campaigns by syncing custom audiences from your contact lists
Click Connect next to Facebook, authorize with your Facebook credentials, and select the Pages and Ad Accounts you want to link.
Google My Business Connects your Google Business Profile so that reviews left on Google can appear in your CRM’s Reputation section, and you can respond to them from there.
TikTok Connects TikTok Lead Generation to pull in leads from TikTok ad campaigns automatically.
Other notable integrations
Section titled “Other notable integrations”- Zoom / Google Meet — Automatically generate a unique meeting link for each calendar appointment. Clients receive the link in their booking confirmation; your team member receives it too.
- QuickBooks — Sync invoice and payment data between your CRM and your accounting software.
- Shopify — Import Shopify customers as CRM contacts and trigger automations based on order events.
- WordPress — Embed forms and chat widgets from your CRM directly onto a WordPress site.
- Zapier / Make (Integromat) — Connect your CRM to thousands of other apps via automation platforms, for anything not covered by a native integration.
Domains
Section titled “Domains”
Connecting a custom domain means your funnels and websites live at your real URL — not a platform subdomain — which builds trust and keeps your brand consistent.
Go to Settings → Domains to connect a custom domain to your account.
Why connect a custom domain
Section titled “Why connect a custom domain”By default, your funnels and websites are accessible at a platform-generated subdomain (something like your-account.somecrmplatform.com). That works, but it tells your clients they’re on a third-party platform — and it looks less professional than sales.yourbusiness.com or booking.yourbusiness.com.
A connected custom domain:
- Shows your brand in the browser address bar
- Improves trust at checkout and on opt-in pages (clients recognize your domain)
- Supports SSL/HTTPS automatically (your CRM handles the certificate)
- Keeps traffic attribution cleaner in analytics
What you need before starting
Section titled “What you need before starting”- A domain or subdomain you own (purchased from any registrar — GoDaddy, Namecheap, Cloudflare, Google Domains, etc.)
- Access to that domain’s DNS settings at your registrar
Connecting a custom domain — step by step
Section titled “Connecting a custom domain — step by step”- In Settings → Domains, click Add Domain.
- Enter the full domain or subdomain you want to use (e.g.,
landing.yourbusiness.comoryourbusiness.com).- Using a subdomain (like
landing.yourbusiness.com) is generally easier — it doesn’t interfere with your main website and requires only a CNAME record. - Using your root domain (like
yourbusiness.com) is possible but may require an ANAME or ALIAS record, which not all registrars support the same way.
- Using a subdomain (like
- The platform displays the DNS record you need to add. It will be one of:
- A CNAME record pointing your subdomain to the platform’s hosting address
- An A record pointing your root domain to the platform’s IP address
- Open a new browser tab and log in to your domain registrar’s DNS settings.
- Navigate to your domain’s DNS management section (sometimes labeled DNS Records, DNS Zone, or Advanced DNS).
- Add a new record using the values shown in your CRM:
- Type: CNAME (or A, as indicated)
- Name/Host: the subdomain prefix (e.g.,
landing) — or@for the root domain - Value/Points to: the address provided by your CRM
- TTL: 3600 (one hour) or your registrar’s default is fine
- Save the DNS record.
- Return to your CRM and click Verify Domain.
DNS changes propagate across the internet at varying speeds — usually within 10–30 minutes, but technically up to 48 hours (though that’s rare with modern registrars). If verification fails immediately, wait 15 minutes and try again.
- Once verified, the domain shows a green status indicator and is ready to assign to funnels and websites.
Assigning a domain to a funnel or website
Section titled “Assigning a domain to a funnel or website”Connecting a domain to your account doesn’t automatically assign it. You also need to set it as the domain for specific funnels or websites:
- For funnels: Open the funnel, go to its Settings tab, and select your connected domain from the Domain dropdown.
- For websites: Open the website builder, go to Site Settings, and select the domain.
One domain can serve multiple funnels (each at a different path) or a single website.
SSL / HTTPS
Section titled “SSL / HTTPS”Your CRM automatically provisions an SSL certificate for every connected domain. This is the padlock icon clients see in the browser. SSL is not optional — browsers flag non-HTTPS pages as insecure, which tanks conversion rates on any page that asks for personal information.
You don’t need to do anything to set this up; it happens automatically within a few minutes of domain verification. If the certificate shows as pending after 30 minutes, click the Refresh or Reissue option next to the domain.
Using your domain for email
Section titled “Using your domain for email”A domain connected here for funnels/websites is separate from your email sending domain. Email authentication (SPF/DKIM) is configured under Settings → Email Services. It’s common to use the same root domain for both, but they’re configured independently. See the Phone & Email settings page for email domain setup.